I Added Some New "Stuff"

Published on Jan 12th, 2017

I’ve added a new Page. It’s called “Stuff”.

The idea is that I will put random pieces of code that I have been tinkering with in there for you to check out if you are interested.

The quality and usefulness of the “Stuff” will vary, so use them at your own risk.

Click or Tap here to check it out.

New Year, New Website!!!

Published on Jan 10th, 2017

Check it out, I finally got around to building a new website.

Features

  • HTTPS
  • PhileCMS
  • Piwik Analytics (data is owned by me and not Wordpress)
  • 100% Custom Theme (might still need some work, but it’s good for now)
  • Mobile Responsive

I am so excited, and I’m looking forward to writing more this year.

Stay Tuned!

Self-Explained Swift

Published on Dec 28th, 2016
// Self-Explained Swift #1
// AutoLayout... Programmatically

import UIKit // Can't do a layout post without UIKit
import PlaygroundSupport // So we can have this class run in a playground

// I will demonstrate a clear concise way to add elements, separate
// layout concerns, and configure your UI... All without Storyboards.

class OurAwesomeViewController: UIViewController {

    // For each of our UI Elements, we are going to make a lazy
    // var property, and an in-line initializer.

    // Because these are lazy, the variables will call their in-line initializer
    // once they are ready to be added to the view hierarchy. Ideally, I would
    // like these to be lazy let so that you wont accidentally change them
    // once they are on-screen, but as of Swift 3 it is not supported.

    // We could just do let, but with a let, it won't let you wire up selectors
    // to self because self is not ready at initialization.
    lazy var titleLabel: UILabel = {

        // Initialize our new label with the default initializer
        let label = UILabel()

        // Always disable this, otherwise you will get layout errors
        // in the debug log. I am not even sure why this defaults to
        // "true" anymore as you will never need it.
        label.translatesAutoresizingMaskIntoConstraints = false

        // We can set fonts
        label.font = UIFont(name: "Menlo", size: 14)

        // Set some text color (note, we are not going for design awards here)
        label.textColor = .white

        // And of course, we can set the text
        label.text = "Awesome"

        // Center our text
        label.textAlignment = .center

        return label
    }()

    // Buttons are fun
    lazy var button: UIButton = {

        // Initialize
        let button = UIButton()

        // Disable this stupid "feature"
        button.translatesAutoresizingMaskIntoConstraints = false

        // Set a button title
        button.setTitle("Press Me", for: .normal)

        // Let's also wire up a button action
        button.addTarget(self,
                         action: #selector(OurAwesomeViewController.buttonTest),
                         for: .touchUpInside)

        return button
    }()

    // This is where you want to build your layout code. This is called by UIKit
    // when your view is being prepared to be put on the screen.
    override func loadView() {

        // Make sure you call super if you plan to use the default view
        // provided by UIKit, if you don't need it, make sure you set
        // self.view to be something
        super.loadView()

        // Customize the view
        view.backgroundColor = .blue

        // StackViews will make your life much easier. The will automatically
        // manage the layout of their owned views and expose some properties
        // to tweak that layout without manually managing potentially dozens
        // of constraints. StackViews can also be nested and given margins, this
        // can allow for quite a bit of flexibiliy AND ease. IMHO, this is much
        // better than manually building all of your constraints.
        let verticalLayout = UIStackView(arrangedSubviews: [titleLabel, button])

        // again, we never need this
        verticalLayout.translatesAutoresizingMaskIntoConstraints = false

        // Make it vertical, and tweak the distribution and alignment
        // feel free to play with these to get a feel for how this works.
        verticalLayout.axis = .vertical
        verticalLayout.alignment = .fill
        verticalLayout.distribution = .fill

        // If you want to have some margins on your StackView, you can enable it like this.
        verticalLayout.isLayoutMarginsRelativeArrangement = true
        verticalLayout.layoutMargins = UIEdgeInsets(top: 20, left: 20, bottom: 20, right: 20)

        // Lets create some constraints to keep our StackView layout in check.
        // This is essentially boilerplate code and you might want to create
        // a micro library to wrap up these common tasks. I will show mine in
        // another post later.
        let topConstraint = NSLayoutConstraint(item: verticalLayout,
                                               attribute: .top,
                                               relatedBy: .equal,
                                               toItem: view,
                                               attribute: .top,
                                               multiplier: 1,
                                               constant: 0)

        let bottomConstraint = NSLayoutConstraint(item: verticalLayout,
                                                  attribute: .bottom,
                                                  relatedBy: .equal,
                                                  toItem: view,
                                                  attribute: .bottom,
                                                  multiplier: 1,
                                                  constant: 0)

        let leftConstraint = NSLayoutConstraint(item: verticalLayout,
                                                attribute: .left,
                                                relatedBy: .equal,
                                                toItem: view,
                                                attribute: .left,
                                                multiplier: 1,
                                                constant: 0)

        let rightConstraint = NSLayoutConstraint(item: verticalLayout,
                                                 attribute: .right,
                                                 relatedBy: .equal,
                                                 toItem: view,
                                                 attribute: .right,
                                                 multiplier: 1,
                                                 constant: 0)

        // Now add our view...
        view.addSubview(verticalLayout)

        // And our constraints.
        view.addConstraints([topConstraint, bottomConstraint, leftConstraint, rightConstraint])
    }

    // Here is our test function to be called when our button is tapped.
    func buttonTest(sender: UIButton) {
        // Nothing fancy here, we will just change the background color.
        view.backgroundColor = .red
    }

}

// Fire up our awesome view controller in a playground.
PlaygroundPage.current.liveView = OurAwesomeViewController()
PlaygroundPage.current.needsIndefiniteExecution = true

// Layout in-code might look a bit daunting, but it allows you to become more familiar with
// the UI elements, their placement, and their properties. It improves change tracking in git
// and personally, I find this much easier to reason as opposed to the black magic of
// Interface Builder.

// BONUS CONTENT!!!

// You might want to know how to use this in an actual Xcode Project, rather than Playgrounds.

// First, in your project file, you might have a "Main Interface" configured, this is normally
// your first storyboard to load. Just open your project file and clear it out.

// Next

// This should be similar to your default AppDelegate. However, the only lines you need to
// change are in the applicationDidFinishLaunchingWithOptions function.
class AppDelegate: UIResponder, UIApplicationDelegate {

    var window: UIWindow?

    func application(_ application: UIApplication,
                     willFinishLaunchingWithOptions launchOptions: [UIApplicationLaunchOptionsKey : Any]? = nil) -> Bool {

        // Let's create a new window. Every app needs one to start.
        // We will set its frame to be the same size of the screen.
        window = UIWindow(frame: UIScreen.main.bounds)

        // Set the window's rootViewController to be the
        // ViewController you want to start with.
        window?.rootViewController = OurAwesomeViewController()

        // This will push it on to the screen.
        window?.makeKeyAndVisible()

        // Unless you have some major failure during this function, you should
        // return true here to let your application know it's ready to go.
        return true
    }
}

// And that's it for my first post, let me know via twitter (@WestonHanners) if you like this
// format and want to see more.

// Keep an eye out for my next post where we will write a few extensions to make the code
// above much easier to manage and read.
Download This Playground

Easy, Automatic Server Mocking for iOS Testing

Published on Jun 27th, 2016

What do you do when you need to run UI tests on an integration server for an app that requires a VPN to reach its web service?

This was a question that I needed an answer for earlier this week. My first thought was to try to stub out the service calls with dummy data and bundle it with my app, but this was going to need a lot of work to maintain and I am pretty lazy. After an hour or so of research, I came upon mitmproxy. Here is the solution…

Project Configuration

First set up a new project configuration and call it something like “Mock” In your app’s target build settings, find the section called “Other Swift Flags”. Twirl down the arrow and add “-D MOCKING” next to your mocking configuration. This works similarly to preprocessor macros in Objective-C, and will allow you to set up code that will only be compiled when it is defined. Hopefully you are using NSURLSession for your API calls, find the place where you initialize it and set its configuration like this.

#if MOCKING

let proxyDict: [AnyHashable: Any] = [
    "HTTPSEnable"   :1,
    "HTTPSProxy"    :"localhost",
    "HTTPSPort"     :8080,
    "HTTPEnable"    :1,
    "HTTPProxy"     :"localhost",
    "HTTPPort"      :8080
]

URLSession.configuration.connectionProxyDictionary = proxyDict

#endif

This will redirect your http and https requests made with that session through your local proxy.

Install and Configure mitmproxy

Now you are ready to install mitmproxy. brew install mitmproxy. After installing, run it once from the terminal to make sure everything works. This will also install a certificate into ~/.mitmproxy.

Clone this repository somewhere.

This tool will install the certificate into your simulators. Run this command:

./iosCertTrustManager.py -a ~/.mitmproxy/mitmproxy-ca-cert.pem

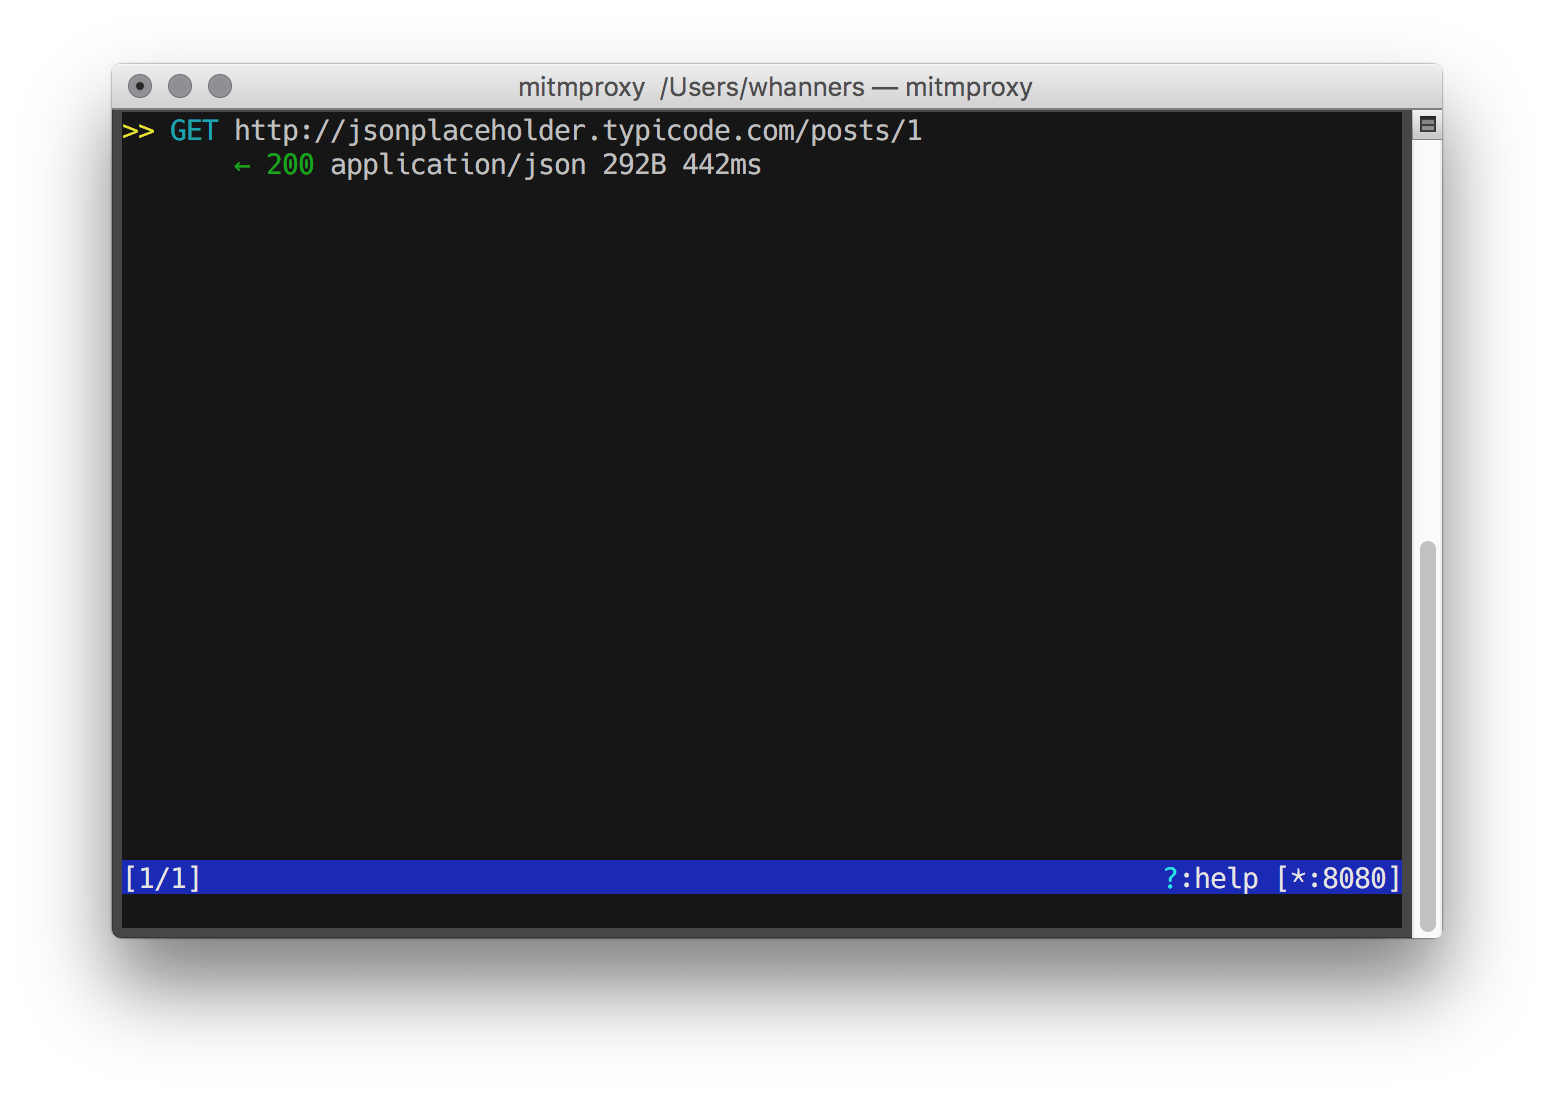
You will have to enter “y” for any of the simulators you want to use. Now comes the moment of truth. Run mitmproxy again and start-up your app. Requests should appear in the window.

Recording

SUCCESS!!!

Start Recording

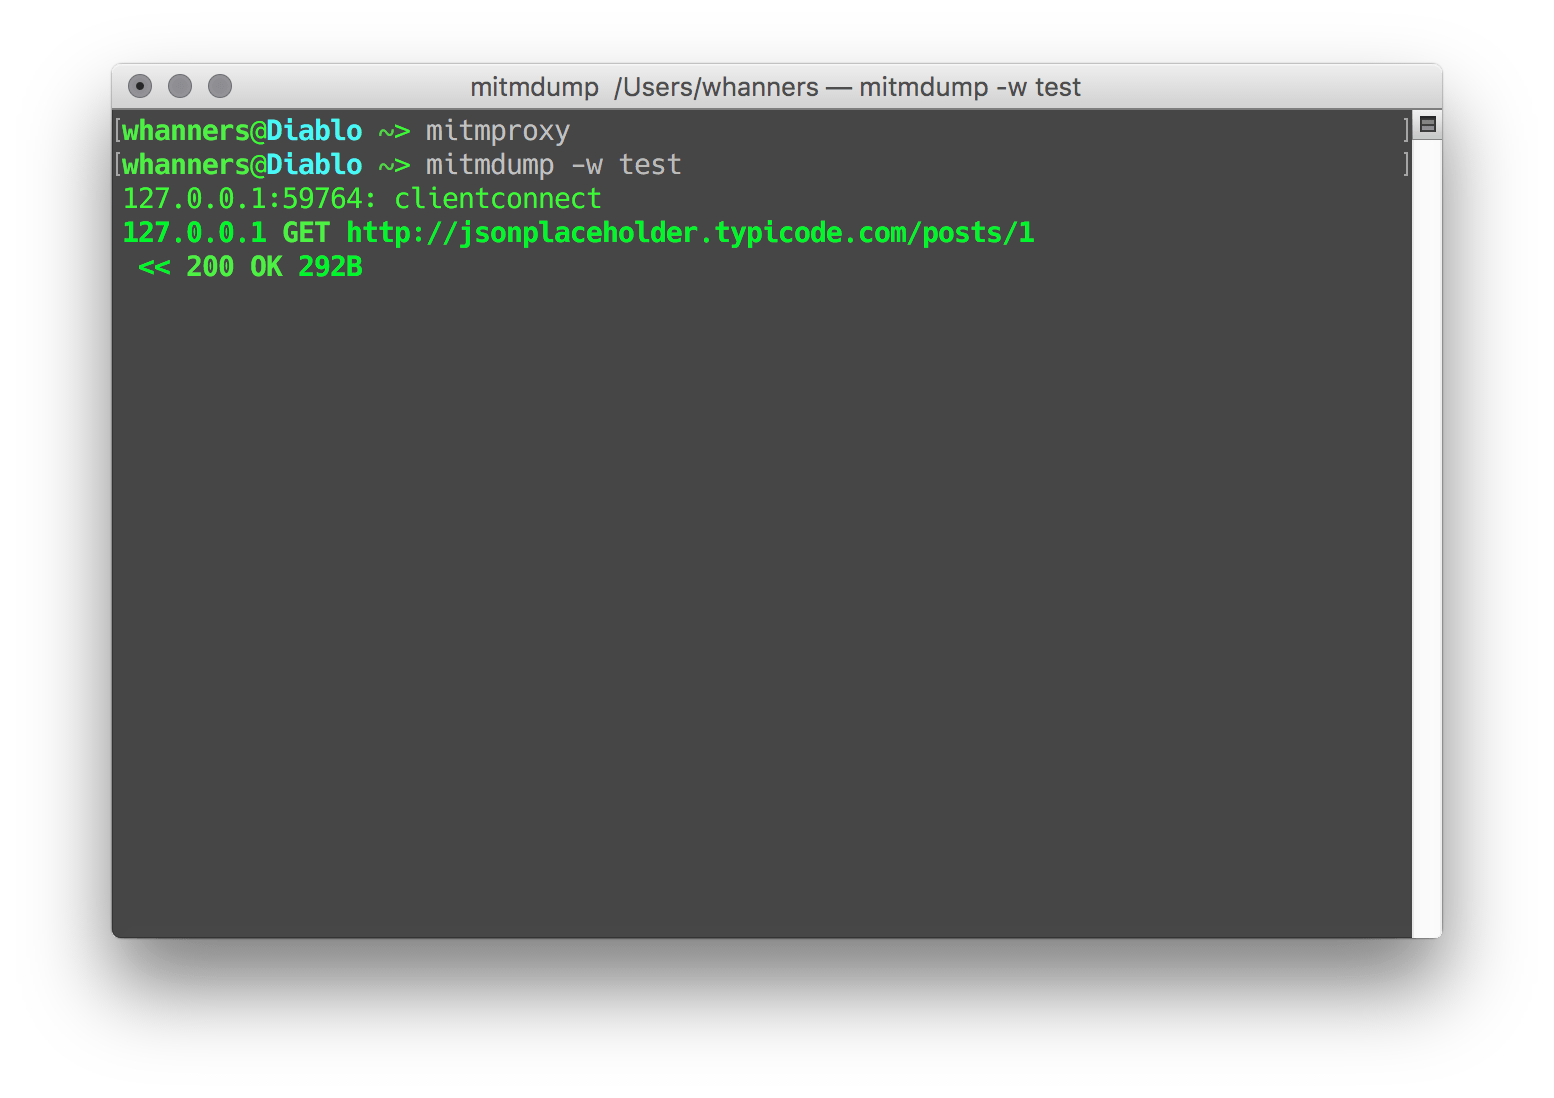
Finally we can start recording, when you are ready, run this command.

mitmdump -w output_file_name

You can name the output file whatever you want. Once it is running, do any actions you want to record in the Simulator, and they will be saved to that file.

Playback

Press CTRL+C when you are done. Now when you want to replay the responses you saved, run this command.

mitmdump -S saved_file

If your server is uses https, you can prevent mitmdump from trying to check the certificates during replay by adding the option “–no-upstream-cert”. You will now be able to run your app, even if you have no internet connection. This works especially well for UI testing since your requests are not likely to differ between runs. …and that’s it. I hope you find this useful, and if you have any questions, feel free to poke me on twitter.

UITableView Storyboard Design

Published on Apr 7th, 2016

Frequently I will come across some code for an iOS app that looks like this.

class ViewController: UIViewController, UITableViewDataSource, UITableViewDelegate {
    
    func tableView(tableView: UITableView, cellForRowAtIndexPath indexPath: NSIndexPath) -> UITableViewCell {
        let cell = tableView.dequeueReusableCellWithIdentifier("basicCell", forIndexPath: indexPath)
        cell.textLabel?.text = "Some Test Data"
        return cell
    }

    func numberOfSectionsInTableView(tableView: UITableView) -> Int {
        return 1
    }
    
    func tableView(tableView: UITableView, numberOfRowsInSection section: Int) -> Int {
        return 20
    }
}

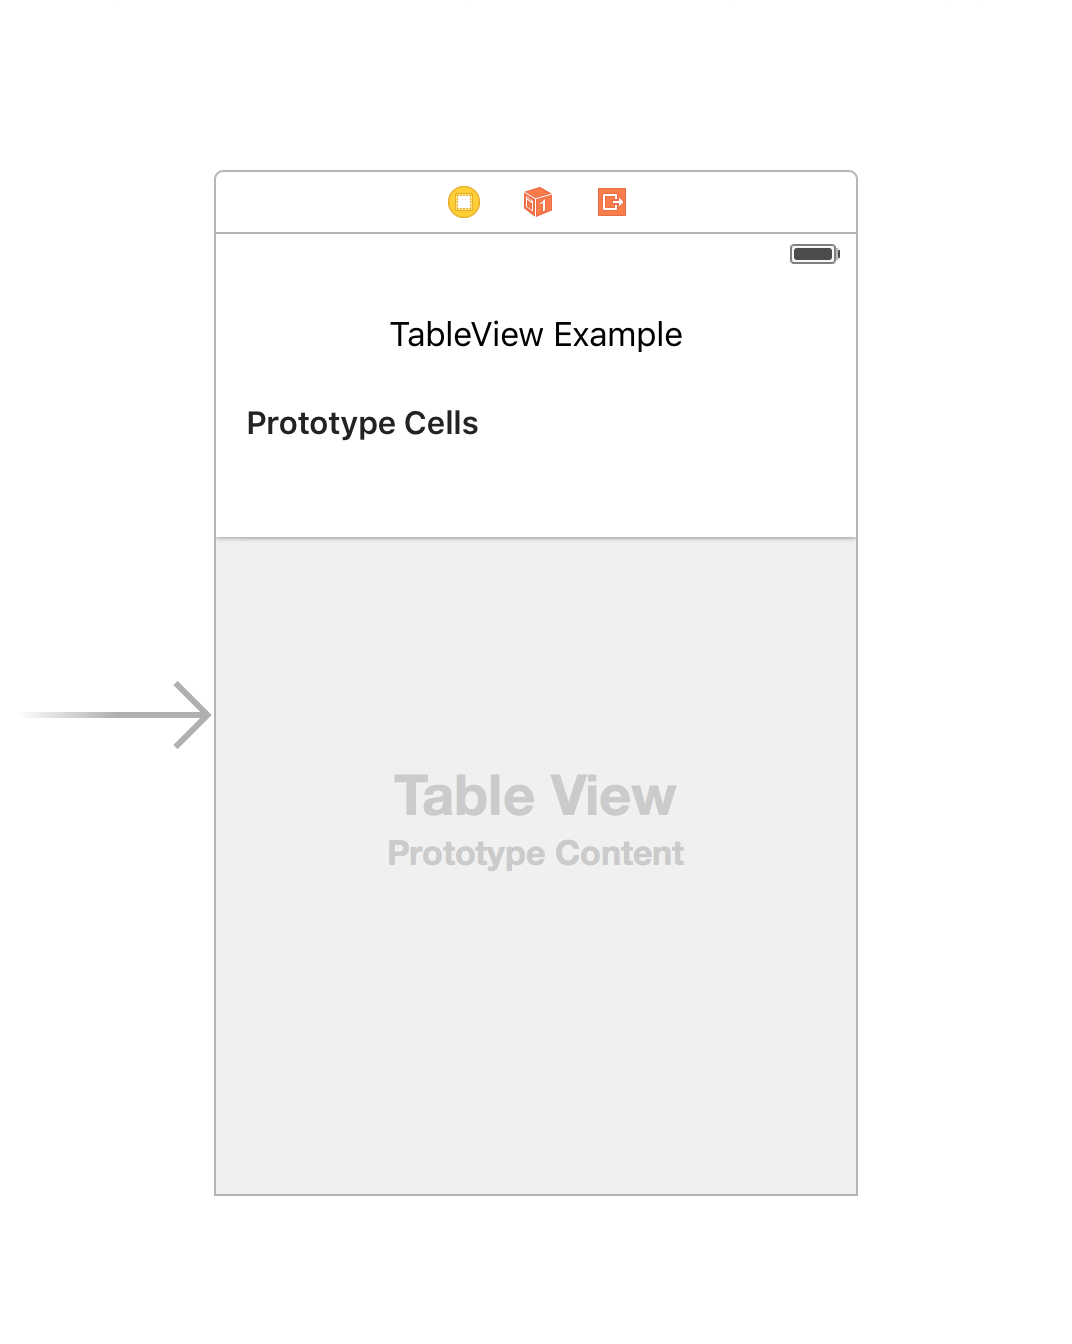
And a storyboard that looks like this.

Screenshot 1

Now, there is nothing wrong about this, a lot of Apple code demonstrates doing this exact thing. You insert a tableView where it is required, implement delegate and datasource protocols, drag connections in your storyboard and you are done, but we can do a lot better. Let’s begin by describing two of the big issues with this particular pattern.

  • This tableView is not reusable, you will have to rebuild it, along with it’s prototype cells in every screen that requires this data.
  • Your viewController will become polluted with code to handle taps, edits and actions for this tableView and will contribute to creating a “Massive View Controller”

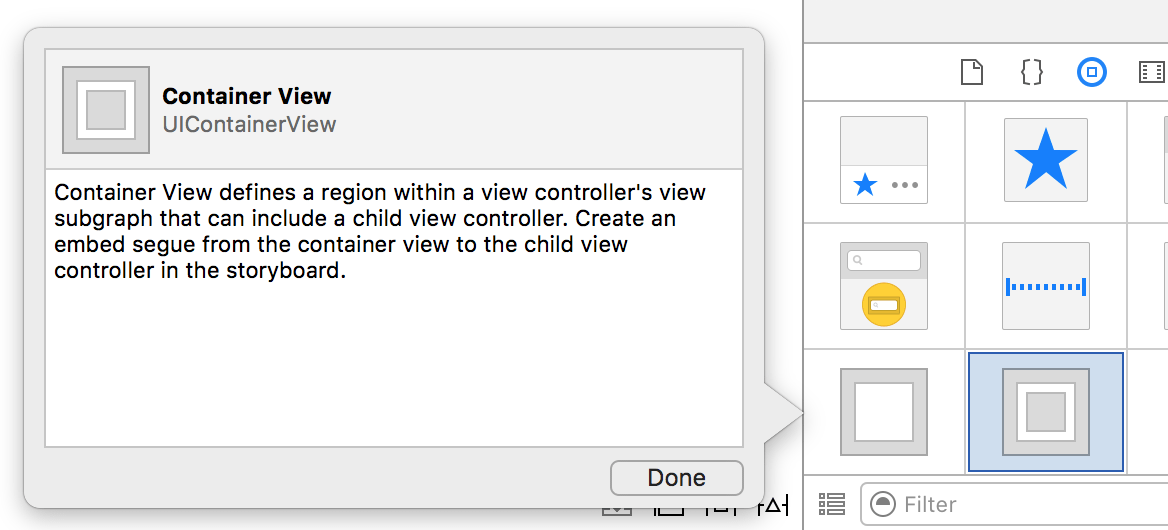
Xcode has given us the tools to improve this quite a bit right off the bat. If you look in the object browser in Xcode, you will find an object you are unlikely to have used before.

Screenshot 2

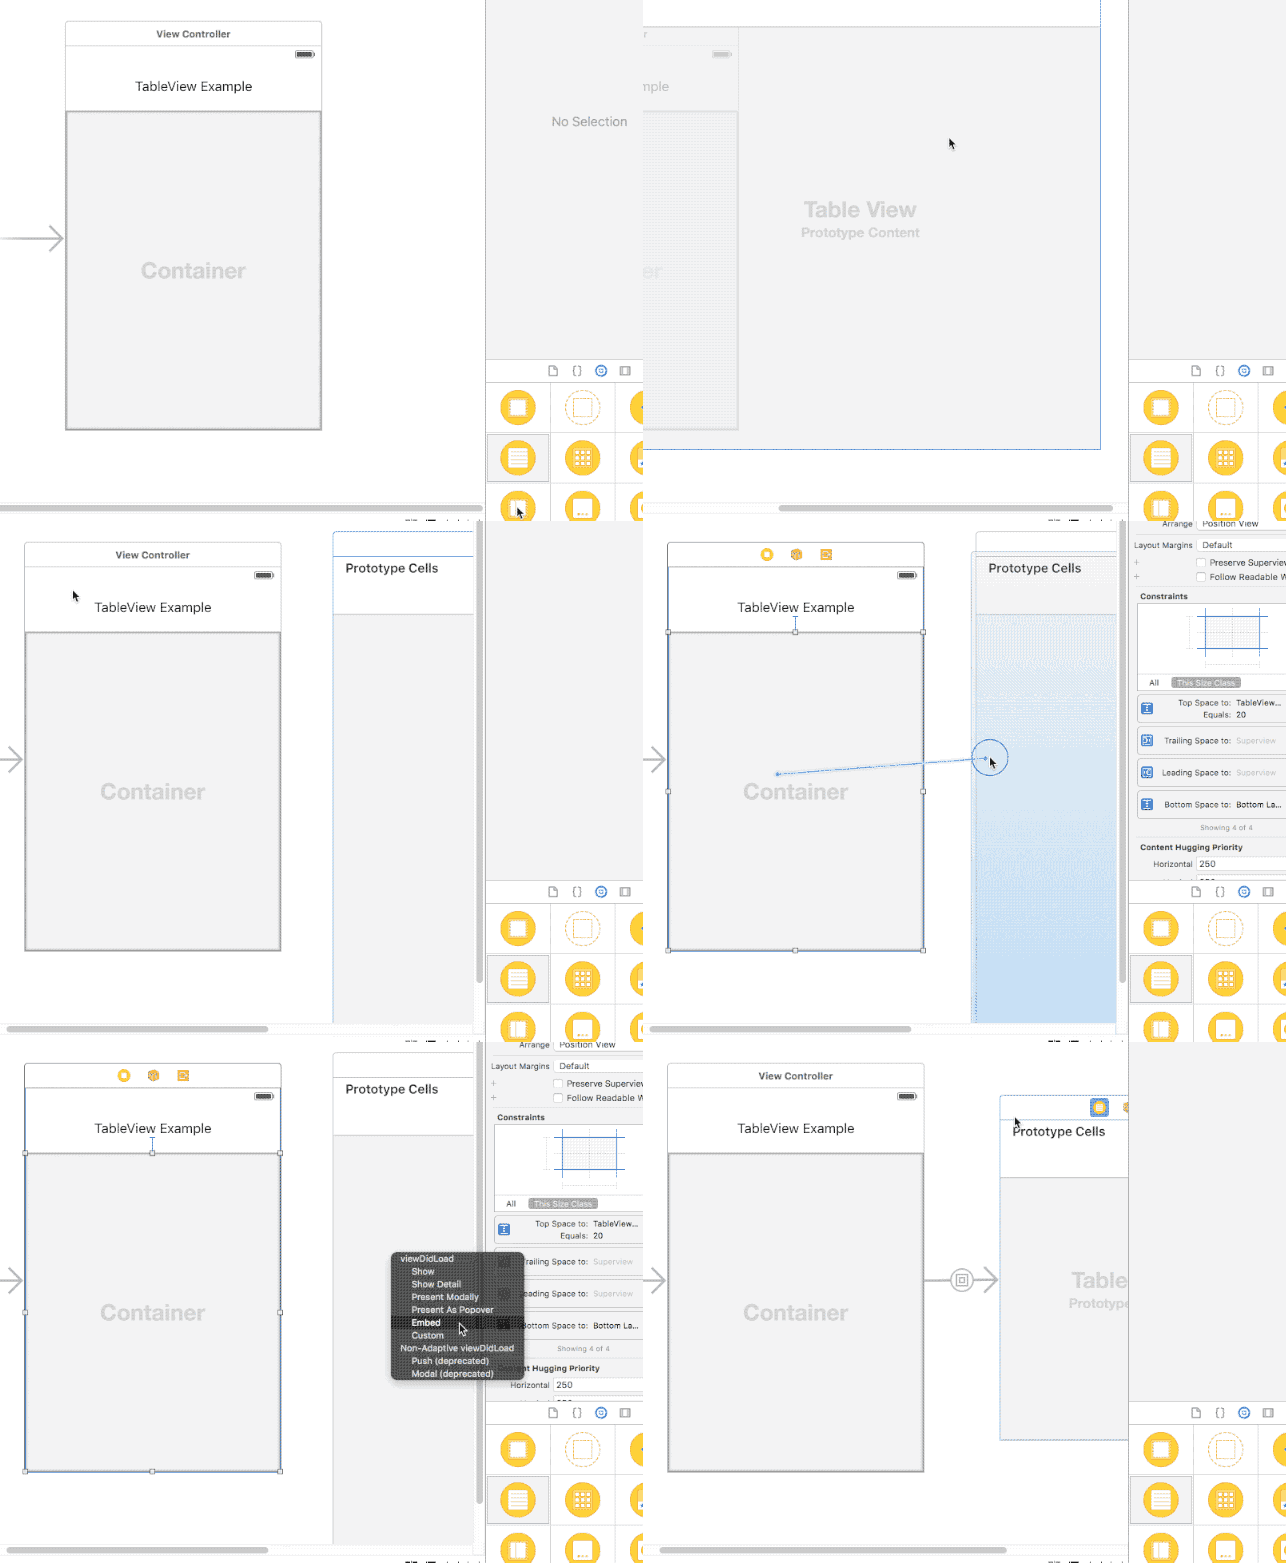
This will allow you to embed a scene from your storyboard directly into another. Let’s see what this looks like. Start by deleting your old tableView then dragging out a UIContainerView and setting its constraints. You would want the container to be positioned in the exact spot you want your tableView to be. You will notice it created a new scene attached to it, it’s a generic UIViewController, go ahead and delete that for now. Drag a new UITableViewController out into your storyboard, we need to reconnect it to the container.

Segue Connection

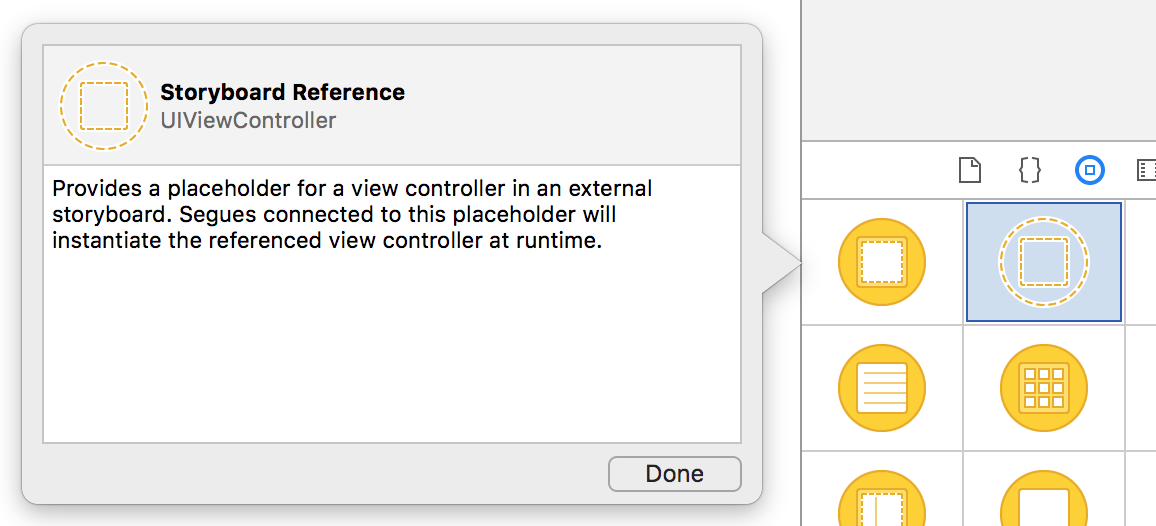
You now have a UITableViewController that can be used between multiple scenes in your storyboard. You just set the controller’s class, stick your delegate/datasource methods in and you are good to go. But we aren’t done yet, in Xcode 7, Apple gave us Storyboard references. By using references, you can embed this tableView in completely different storyboards. Start by dragging out one of these guys into your other storyboard

Screenshot 4

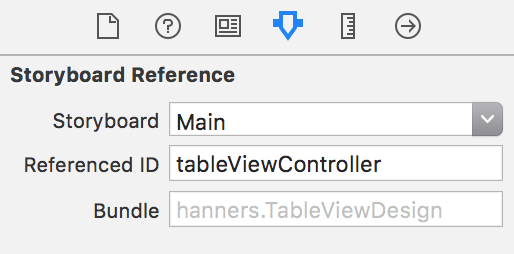
Next you want to set its storyboard and identifier (I have my tableView scene from the above the identifier “tableViewController”, but you can make something more fitting for your app). The identifier here needs to match whatever you put in your tableView scene’s “Storyboard ID”.

Screenshot 5

Now you can repeat the same steps as above to create and connect a UIContainerView to this new reference and voila you have embedded the tableView here as well. I hope this helps you improve your app structure and write less code. I was blown away when I found out how to do this. If you have any questions, poke me on twitter and I will try to help you out.