Moving to Mastodon
I think the past few weeks have had everyone thinking where are we going with Elon Musk taking control of Twitter.
Like many I have had two concerns on the top of my mind.
- Should I delete my account?
- Where are we going?
The first issue seemed easy, I went ahead and requested my Twitter data archive. It was time consuming, but not at all difficult. As my cursor hovered over the delete button, I was suddenly reminded of all the sites I have signed into with my Twitter credentials. I decided I would hold off on the full account deletion and will simply let it lie dormant.
The second issue was a bit more interesting. I, was immediately reminded of Mastodon. This decentralized, hub-based social network has been around for some years, but mostly for small niche communities. Since I last checked, it looks like they have really improved on their feature set and at this point, I didn’t seriously consider any other options. I have a new profile set up here.
The cool thing about Mastodon is that you can join “hubs” that are interesting to you, and there is no shortage of niche communities. I joined Tech Hub most of the posts are tech centric and very interesting.
I think this is likely to be confusing to many people so I want to see if I can help explain how this all works.
Be warned, I am still fairly new to Mastodon, but this is my understanding.
What is affected by my hub choice?
Short answer: not much.
Your hub choice will determine your “local” feed content, on a typical configuration this will be all posts from your hub.
Your “home” feed is a list of all the profiles you follow from your hub or any other hub that isn’t explicitly blocked.
Finally there is a “federated” feed that is a unified feed from your hub and any hub yours is working (or federated) with. You might see some people refer to this graph of connections as the “Fediverse”.
I think the biggest issue would be if you chose a hub that gets defederated. This has happened with some hub with extreme political, violent, or sexual content. If you choose poorly the good news is you can always just pack up and move to a different hub.
What client should I use on mobile?
I’ve tried a handful of iOS clients, but so far my favorite on iPhone is Metatext, It has a great UX and feels snappy.
A close second is Toot!. My biggest issue with Toot! is I think it over did it a tiny bit with the animations.
There is an official client but I found it a bit sluggish and buggy.
How do I find my friends?
This is probably one of the biggest conversion friction points, especially with many hubs rate limiting rapid follows. With multiple hubs and no central verification it can be difficult to determine if you are following the right person. I do recommend using fedifinder to help locating your friends.
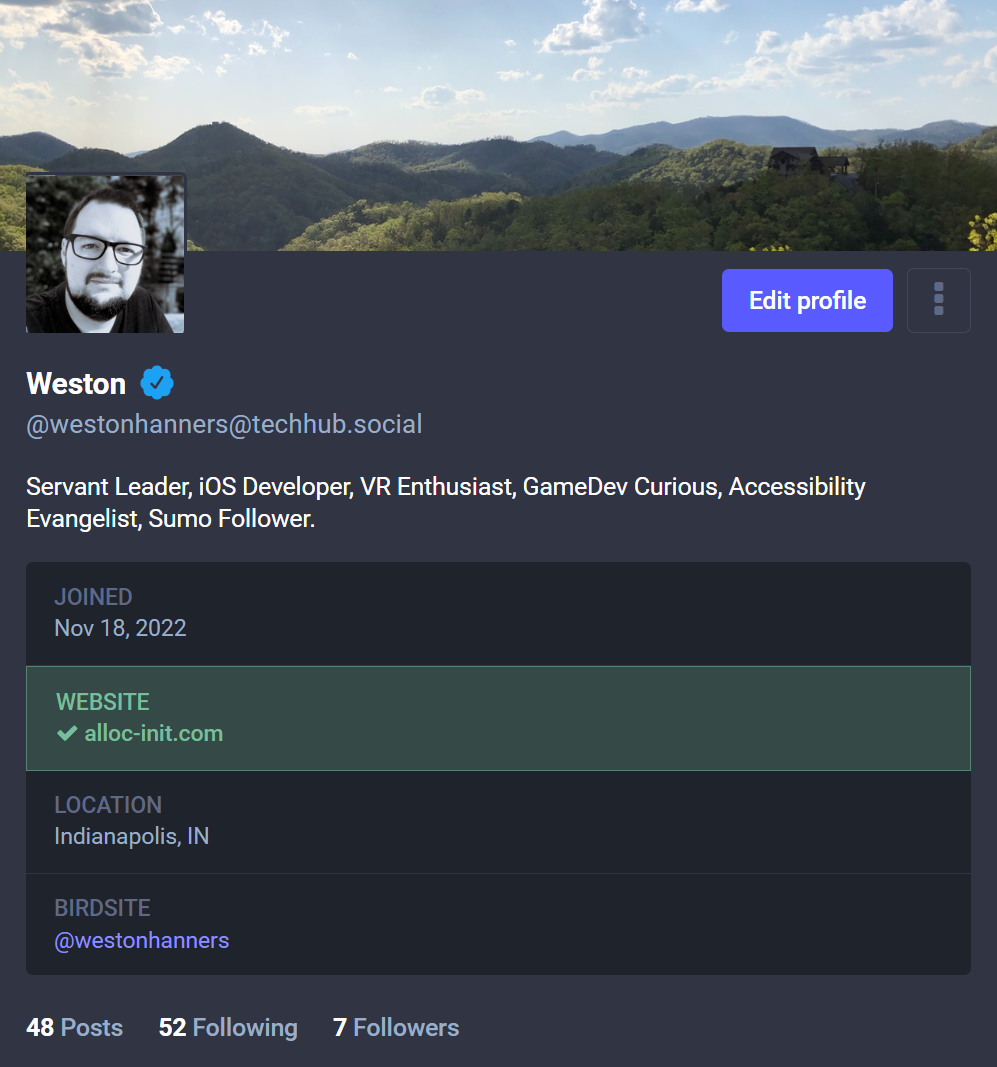
What are these Metadata fields?
They are for whatever you like, you can add any additional information that you think is useful for you profile. I personally put my twitter link, web site and location.
Other Tidbits
Not everyone will be onboard for calling posts “toots”, the MetaText client has an option for renaming toot to post.
I think they also need to make it easier to follow people from a web link. Right now you have to copy the users profile link and paste it in your own hub to follow, it’s weird and unnecesary, I hope they figure it out soon.
If you have a website, you can easily get “verified” by adding a backlink to
your mastodon profile with rel="me" attribute set. Then add a “website”
metadata property on your profile with your website linked and it will get a
green checkmark. This tells your followers that you own the domain, and for most
reasons, this is nearly as good as twitter verification. More details
here.
There is a weird meme on Mastodon where no one refers to Twitter by name, like It’s Lord Voldemort or something. If you see “birdsite” that means Twitter.
Oh yea, follow Feditips. This account posts frequent tips and tricks and has been a great resource for getting started.
Conclusion
Mastdon is really interesting and I am going all in, I do think that some people will have trouble “getting it” but maybe with some more updates and more traction we can finally ditch the monolithic corporate social network.
I hear a bunch of people are heading to Hive Social, and maybe it will become a big thing, but after MySpace, Frendster, Foursquare and now Twitter… I think I am content to stick with Mastodon.